W211 DIY Lower Control Arm and Ball Joint Change
Why?
Dealer wanted $66x2 for ball joints and $400 for Labor. For the Lower control arm $290x2 and another $400 for labor – a total of $1,500
I decided to change it myself. I purchased both Ball joints on ebay for $53 (free shipping), and both lower control arm for $162 (including shipping).
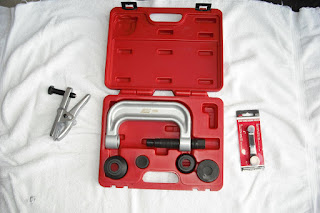
I had to buy two special tools. 1) Ball Joint Separator $35 (including shipping) and 2) Ball joint Remover/Installer $92.00 (including shipping) – a total of $342.
This job will save me over $1150.00.
1) Jack up front of the car, put jack sands on both sides, leave the jack in the middle, put stopping blocks on both rear wheels.
2) Take the front wheels off, remove the dust pans from under the car.
3) Loosen the 21mm nut on the ball joint (top) and the 21mm nut on the lower control arm ball joint (bottom).
4) Use the Ball Joint Separator tool, break loose both ball joints. I highly recommend this tool!! Use an impact wrench if you can, when the ball joint breaks loose, it is quite violent.
.
5) The other end of the lower control arm, loosen the nut and bolt that holds the body (9/16 - 12 point socket and a 21mm socket).
6) Remove the Lower control arm.
7) Lower the steering knuckle out of the way, then Put the Ball Joint Remover/Installer Tool on the Ball Joint, press the old ball joint out. YOU MUST HAVE THIS TOOL, THIS JOB CANNOT BE DONE WITHOUT IT. ALSO, YOU WILL NEED TWO BREAKER BARS. ALSO CANNOT BE DONE WITH OUT IT.
8) Using the same Ball Joint Remover/Installer Tool, press the new ball joint in.
9) Put the steering knuckle, ball joint back together, tighten the ball joint.
10) Put the new lower control arm back in place, tighten the ball joint, and the nut and bolt on the other end.
11) Put the dust pans back
12) Put your wheels back on
13) Lower the car. You just saved over $1,150.00!
Now, go take a look at my write up on DIY W211 Front End Alignment!
http://mercedes-diy-alignment.blogspot.com/


